You want a sleek, uniform wall without burning weekends on endless re-rolling. The secret isn’t brute force it’s method. With the right surface prep, product choices, and a few pro motions, you can muur verven surfaces in a single confident pass (plus a well-planned primer) instead of stacking on “just one more coat.” At Nourklusbedrijf, we keep things practical: fewer steps, tighter quality control, cleaner edges, and a finish that looks intentional because it is. Most people assume more paint equals better coverage. In practice, the opposite can happen: heavy layering traps roller marks, amplifies lap lines, and creates sheen swings. A crisp result comes from three pillars sound substrate, even film build, and continuous wet edge work. When those are in place, a quality topcoat can paint wall areas cleanly without chasing imperfections that shouldn’t have been there.
Surface truthing and micro repairs
Start with what your eyes almost miss pinholes, hairline cracks, glossy patches from old touch ups. Light the surface from the side and circle defects with a pencil. Feather sand shiny spots (P180-P220), fill micro voids with a fine filler, and sand flush. Dust once with a microfiber cloth. A five minute pass here saves an extra day later, because any defect telegraphs through as soon as you paint wall areas under modern, directional lighting.
Prime with purpose (and tint it smartly)
Primer isn’t just for adhesion; it equalizes porosity so your topcoat dries at one pace. That kills patch mapping those dull islands that force “just one more pass.” Use a stain blocking primer on old water marks and a drywall primer on fresh skim. Then, if you’re covering a strong color, ask the store to tint the primer toward your topcoat. That way, when you paint wall surfaces, the color reaches depth faster and you avoid stacking unnecessary layers.
The pro way to cut and roll
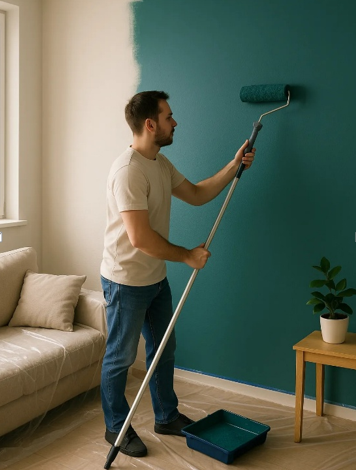
Cut short, roll immediately. Don’t outline the whole room and come back later. Cut a 1-2 meter vertical band along the corner or trim, then roll that band before the cut line flashes off. Work in panels you can finish wet. This keeps the cut texture and the roller texture drying together, so when you paint wall transitions, you don’t lock in a visible frame. Load properly. Dip, roll on the tray’s ramp in a few quick passes, and keep the sleeve evenly saturated not dripping, not dry. Lay on, lay off. Apply paint in a gentle “W,” fill the gaps without overworking, then lay off: one light, top to bottom pass with barely any pressure, overlapping the previous strip by a third. This removes chatter and lines before they set.
Control the wet edge (the difference you can see)
A wet edge is where your last roller pass still glistens. Always roll the next pass into that shine and move methodically across the wall. If a phone call or doorbell interrupts, stop at a natural break (corner, column, window reveal). When you paint wall surfaces in continuous panels, you prevent lap marks the faint stripes that appear when half dry paint meets fresh paint. Edges freeze faster than fields because there’s less mass. When you cut, don’t leave ridges wipe the brush lightly along the cut line to thin any accumulation. Then roll into that edge within minutes. If you see minor orange peel or stipple while you paint wall corners, resist the urge to keep rolling; most quality paints self level if you leave them alone for five minutes. Sheen shows everything. If you’re covering patched walls or heavy traffic marks, favor matte/eggshell; lower reflectance forgives slight texture differences. Test your color on two cards: one next to a window (raking light) and one opposite it (bounce light). Walk the room at different times of day. Many “needs another coat” moments are actually lighting artifacts. Checking before you paint wall surfaces saves material and hours.
See also: Aluminium Fence Contractors Near You: A Homeowner’s Complete Guide
Fixing the “almost” without adding a full coat
Small misses don’t require starting over. If you spot a faint holiday (thin patch) after drying, scuff that area lightly with P320, dust, and touch it with a mini roller loaded the same way as your big sleeve. Feather outward two roller widths. This micro blend saves you from re-rolling the entire field just to paint wall areas that were already perfect. Honesty matters. Some scenarios genuinely need a second pass: dramatic color jumps (deep navy over bright white), walls with patchwork porosity even after priming, or ultra flat paints under sharp raking light. In those cases, schedule coat two within the manufacturer’s recoat window. Your first coat did the heavy lifting; the second is a whisper coat to unify color and sheen not an invitation to re-engineer texture when you paint wall finishes that already look level.
What you can expect with Nourklusbedrijf
We start with a short lighting audit, map defects under side light, and specify primer and topcoat to match your substrate and lifestyle (washability, scuff resistance, sheen). Our teams cut and roll in synchronized panels to protect the wet edge and deliver a uniform film in less time. The outcome: you paint wall areas once with intent instead of three times with hope and your spaces read calm, clean, and finished.
Final word: Craft over coats
The difference between “good enough” and “how did they get it so flat?” isn’t a mystery bucket it’s sequence, tempo, and restraint. Prep what matters, prime with purpose, keep the roller moving into shine, and stop before you overwork. Do that, and you’ll paint wall surfaces that stay even from skirting to ceiling no extra layers required. Want the crisp look without the learning curve? Nourklusbedrijf can survey your rooms, select the right system, and finish with the pro motions that keep coats and costs down. When method does the heavy lifting, you don’t.
Discover how Nourklusbedrijf can support you with tailor made solutions.