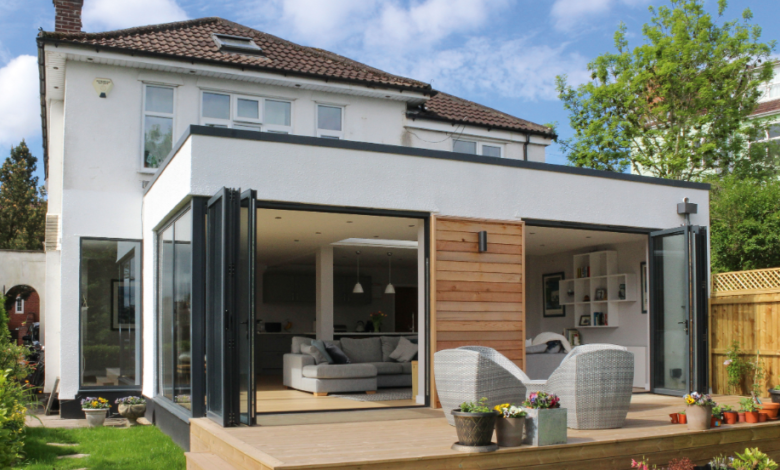
Adding a single storey extension is one of the most practical ways to increase space in your home. It’s less disruptive than a multi-storey project, more affordable than moving, and can improve both functionality and value. But to make the process smooth, it’s important to understand each step from planning to completion.
Step 1: Assess Your Needs
Before you start, think about why you need the extension. Ask yourself:
- Do you need more living space, a larger kitchen, or an extra bedroom?
- Is it for work, leisure, or family use?
- How will it connect to your existing rooms?
Knowing your purpose early helps guide the design and ensures the space meets your needs.
Step 2: Check Your Property and Rights
Not every project can proceed without planning permission. Start by:
- Checking permitted development rights (PDR): Many single-storey extensions fall under PDR, meaning you may not need full planning permission if you stay within size and height limits. Detached houses can often extend up to 8 metres at the rear; other houses up to 6 metres.
- Confirming local rules: Some areas, like conservation zones or streets with Article 4 directions, may have stricter limits.
- Reviewing building regulations: PDR does not replace building regulations. Your extension must meet standards for structure, insulation, fire safety, and energy efficiency.
Consult your local council or a planning professional to avoid surprises.
Step 3: Set Your Budget
Single-storey extensions are more affordable than larger projects, but costs still vary based on:
- Size of the extension: Bigger rooms require more materials and labour.
- Materials and finishes: Brickwork, windows, flooring, and interiors affect the cost.
- Labour: Experienced builders may charge more but deliver better results.
- Additional features: Plumbing, heating, or electrical work can add to expenses.
Include a contingency for unexpected costs—around 10–15% of the total budget is typical.
See also: When the Heat Hits Hard: Navigating AC Repair in Phoenix Homes
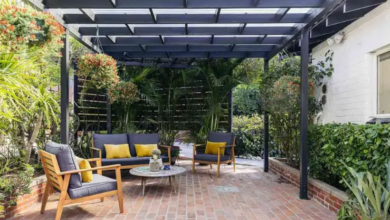
Step 4: Design Your Extension
Good design ensures your extension is functional, attractive, and fits seamlessly with your home:
- Layout: Consider how the new space will connect with your existing rooms. Open-plan layouts work well for living areas, while separate zones may suit kitchens or offices.
- Natural light: Include windows, skylights, or glass doors to keep the space bright.
- Flow and access: Ensure easy movement between rooms and, if applicable, the garden.
- Materials: Use exterior materials that match your existing home. Inside, choose practical and durable finishes.
- Energy efficiency: Modern insulation, heating, and ventilation improve comfort and reduce running costs.
An architect or designer can create plans that balance style, functionality, and compliance.
Step 5: Obtain Permissions (If Needed)
If your extension exceeds permitted development limits or is in a restricted area, you’ll need planning permission. The process typically involves:
- Submitting plans to your local council
- Receiving feedback or requested changes
- Waiting for approval, usually 8–12 weeks
Even if PDR applies, submitting a building notice for building regulations approval is often necessary. This ensures your extension is safe and legal.
Step 6: Hire Professionals
Choose skilled and reputable professionals:
- Builders: Ensure they have experience with single-storey extensions and a good track record.
- Architects or designers: They can create plans that are both functional and compliant.
- Surveyors: Useful for checking structural requirements and site conditions.
Get multiple quotes and references to make sure you get quality work within your budget.
Step 7: Construction Phase
Once planning and permissions are in place, construction begins:
- Site preparation: Clearing the area and ensuring the foundations are ready.
- Foundations and structure: Laying foundations, building walls, and installing roof structures.
- Utilities and services: Plumbing, heating, and electrical systems are installed.
- Interior work: Flooring, plastering, painting, and finishes.
- Final checks: Building inspectors may visit to ensure compliance with regulations.
The construction timeline varies depending on size and complexity but usually ranges from 8–16 weeks.
Step 8: Completion and Final Inspection
When the extension is finished:
- Conduct a walkthrough with your builder to ensure everything is completed to standard.
- Obtain a completion certificate from the building inspector to confirm compliance with building regulations.
- Furnish and decorate the new space as desired.
Step 9: Enjoy Your New Space
Once everything is complete, your home has extra usable space that enhances daily life, increases property value, and improves comfort.
Adding a single-storey extension is a smart way to enhance your home without taking on a full-scale renovation. By following a clear process—from planning and design to construction and final inspection—you can ensure the project runs smoothly, meets legal requirements, and provides the extra space your family needs.
Careful planning, realistic budgeting, and professional guidance make all the difference. With the right approach, a single-storey extension can transform your home efficiently, affordably, and beautifully.