Automated Bore Inspection with AI‑Powered Machine Vision Systems

In industries such as aerospace, automotive, heavy machinery, and medical devices, inspecting the internal surfaces of cylindrical cavities—also known as bores—is mission-critical. Even the smallest imperfection inside a bore—scratches, pits, cracks, burrs or dimensional irregularities—can compromise performance, safety, or fit. Manual methods fall short in reaching deep, narrow bores reliably. That’s where Automated Bore Inspection powered by a high‑precision machine vision system changes everything.
The Hidden Challenge of Bore Inspection
Bores—narrow cavities or internal cylindrical holes—are hard to access and inspect. Traditional borescope tools offer visual access but lack the resolution and analytics needed for accurate, repeatable inspection of micron-level defects. The challenges include:
- Restricted access, especially when bores are ≤ 5–8 mm in diameter—traditional cameras cannot reach
- Complex internal geometry, making comprehensive imaging difficult
- Microscopic defects, such as hairline cracks or corrosive pitting
- Inconsistency, since manual inspection is subjective and time-consuming
- High throughput demands, requiring rapid, reliable inspection across many parts
How Automated Bore Inspection Works
Intelgic’s solution combines advanced imaging hardware with AI-driven analysis to deliver a complete inspection process:
A. Borescope and Vision Integration
The system utilizes high‑resolution borescope cameras inserted into the bore via robotic or mechanical motion to capture detailed imagery—covering up to 47 mm depth and fine internal diameter features.
B. Machine Vision AI Software
Intelgic’s Live Vision AI analyzes borescope images in real time, identifying defects such as scratches, cracks, corrosion, burrs, and dimensional anomalies. The software uses pattern recognition to distinguish acceptable variations from true defects and deliver immediate feedback.
C. Robotic Arm Integration
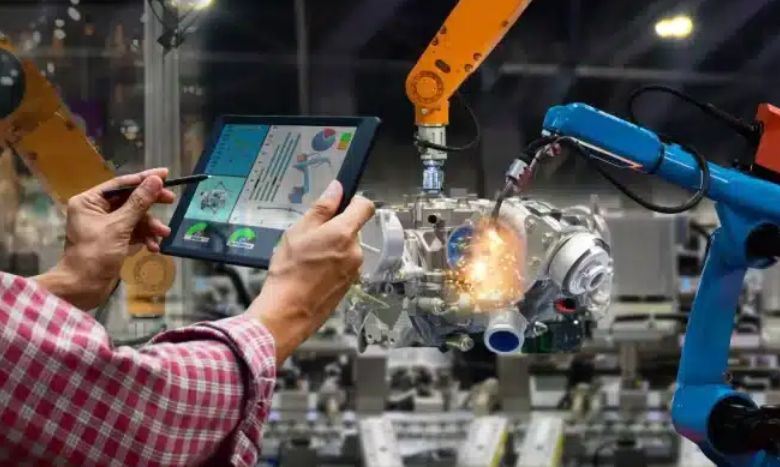
Robotic arms—often programmed via ROS—precisely maneuver the camera and lighting suite inside the bore. The motion ensures full surface coverage, consistent focus, and repeatable capture of internal geometry from all angles.
See also: Unlocking Vision with Monocular Camera Technology
Core Features & Benefits of Machine Vision‑Driven Bore Inspection
| Feature | Value Proposition |
| Micron‑level sensitivity | Detects defects such as fissures, pits, and burrs even below 0.1 mm |
| Comprehensive coverage | Full inside surface view via robotic scanning, eliminating blind spots |
| Real‑time analysis | Instant defect detection and classification for zero latency feedback |
| Automated reporting | Logs defect type, size, and location; timestamps; and includes images |
| High-throughput capability | Consistent performance in production environments with minimal manual oversight |
| Adaptability | Configurable for different bore sizes, geometries, and defect thresholds |
Typical Workflow: From Part Entry to Insight
- Calibration & Setup
The AI system is trained on defect-free bores to establish reference appearance. Inspection zones are defined along the bore’s ID features—grooves, chamfers, threads, or smooth sections. - Insertion & Scanning
The robotic arm positions the borescope and lighting. The camera advances and rotates—often spinning while moving—to capture every degree of the internal wall. - Image Capture & Illumination
Uniform integrated lighting ensures high-contrast, visible marks over the entire internal surface—critical for reliable defect detection. - AI Analysis
Live Vision AI processes each frame, detecting imperfections such as scratches, pits, cracks or dimensional anomalies, and distinguishes false positives from acceptable wear. - Reporting
Each inspection generates a structured log: defect classification, location, size, visuals, and pass/fail status. These datasets feed into SPC systems or production control layers. - Feedback & Action
The system can integrate with PLCs or MES to trigger part rejection, operator alerts, or automated messaging—all instantly based on inspection result.
Key Applications Across Industries
Automotive: Inspection of engine cylinder bores, valve bodies and hydraulic cylinders to detect porosity, score lines, or machining marks before assembly.
Aerospace: Turbine blade bores, hydraulic actuators, and landing gear components need flawless internal surfaces for structural integrity.
Heavy Machinery: Rotating shafts, pump bodies, hydraulic pistons, and large‑scale cylinders rely on clean internal surfaces for longevity.
Oil & Gas: Valves, drill pipe interiors, and boreholes must be inspected for pitting, wear, or cracks, especially in safety-critical contexts.
Medical Devices: Precision instruments and surgical implants often feature small internal cavities where defects are unacceptable.
Why Automated Bore Inspection Outperforms Manual Methods
- Accuracy: Detects sub-0.1 mm defects reliably—far beyond the human eye.
- Speed: Rapid robotic scanning combined with AI analysis accelerates inspection cycles.
- Consistency: AI offers uniform performance; there’s no fatigue or subjectivity.
- Traceability: Full inspection logs with annotated images ensure audit-ready quality control.
- Scalability: Easily adaptable to different part geometries and high-volume processing needs.
Supporting Technologies & Metrics
Industrial research underpins this approach. For instance, borescope-based methods with flexible light arrays have demonstrated defect detection accuracy within ±10 μm on bores as narrow as 4 mm deep to 47 mm. Similarly, systems coupling rotary scanning probes and structured automation capture dense 3D point clouds—enabling high‑speed bore profiling with micron-level precision in under four seconds per bore.
Implementation Considerations
- Hardware selection: Borescope cameras need high resolution and sensor quality to detect fine internal flaws.
- Robotic motion control: Accurate, smooth movement is essential to prevent blur and ensure coverage.
- Lighting calibration: Custom internal illumination reduces glare and emphasizes real surface anomalies.
- AI model training: Requires representative samples of defect types and clean bores for baseline.
- Integration: Systems must connect with PLC or MES layers for real-time feedback and data push.
- Operator training: Staff should understand threshold tuning, image evaluation, and system maintenance.
Future Horizons in Bore Inspection Technology
The field is evolving with innovations such as:
- 3D bore metrology: Rotational scanners generate complete bore point-clouds for GD&T analysis and inside‑dimension measurement in one pass.
- Edge AI: Embedded AI processing enables ultra-fast decision-making on the fly.
- Adaptive visual inspection: AI models continuously learn from new defects to reduce false positives.
- Combined OD/ID inspection: Systems measure both inside and outside surface integrity in a single setup.
- Predictive maintenance feedback: Defect trends inform upstream machining adjustments or tooling wear detection.
For industries where internal bore quality cannot be compromised, Intelgic’s Automated Bore Inspection powered by an advanced machine vision system delivers unmatched accuracy, efficiency, and scalability. With AI-performing real-time analysis of high-resolution internal images, manufacturers gain full assurance of bore integrity—and the confidence to eliminate manual blind spots.
By automating the inspection of internal cylindrical features, businesses can reduce scrap, prevent failures, and streamline quality assurance workflows. If precision, repeatability, and traceability matter—and they do—then adopting an AI-based bore inspection ecosystem is no longer optional; it’s essential.


